Rebuild of a Mid 1928
Transmission
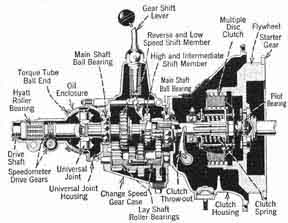 |
The following is a bunch of photos I took while rebuilding a multi disc type Model A transmission, along with illustrations from the service bulletins and 'The Ford Model A Service Manual and Owners Handbook of Repair and Maintenance'.
There are several differences in the transmission case and internal parts over the years of production.
  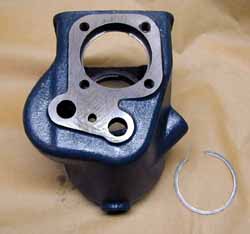
Part Number and descriptions appear on Mouse over |
- PARTS LIST FOR MID 1928 TRANSMISSON
- A-7006-B Transmission case
- A-24452 Transmission case filler plug 3/4" USS x 1-3/16" square head pipe plug
- A-24452 Transmission case drain plug 3/4" USS x 1-3/16" square head pipe plug
- A-7017-A Transmission main drvie gear
- A-21940 Transmission main drive gear nut 7/8"-14 USF (9/16x1-1/4)castle nut
- A-22420 Transmission main drive gear washer 7/8 (1/8x1-7/16)plain washer
- A-23554 Transmission main drive gear cotter 1/8 1-3/8 cotter
- A-7025 Transmission main drive gear ball bearing
- A-7040 Transmission main drive gear bearing Oil baffle
- A-7043 Transmission main drive gear bearing Oil thrower
- A-7044 Transmission main drive gear bearing spacer
- A-7045 Transmission main drive gear snap ring
- A-7046 Transmission main drive gear bearing Oil ring
- A-7047 Transmission main drive gear bearing Oil retainer
- A-7060 Transmission main Shaft and collar assembly
- A-7120 Transmission main shaft pilot bearing
- A-7065 Transmission main shaft ball bearing
- A-7080 Transmission main shaft bearing Oil baffle
- A-7085-B Transmission main shaft bearing retainer
- A-7086 Bearing retainer gasket
- A-21l16 bearing retainer to transmission case screw 7/16-20 USF x 1" hex head screw(4)
- A-7l00 Transmission low and reverse sliding gear
- A-7l01 Transmission high and intermediate sliding gear
- A-7111 Transmission countershaft
- A-7112 Transmission countershaft gear assembly
- A-7119 Countershaft gear thrust washer
- A-7l20 Countershaft gear bearing short (2 req)
- A-7121 Countershaft gear bearing long
- A-7l38-B Transmission reverse idler shaft assembly
- A-7141 Reverse idler gear and bushing assembly
- A-7155 Transmission countershaft and reverse idler shaft retainer
- A-20904 Countershaft and reverse idler shaft retainer screw 3/8-16 USS x 1" hex head screw
- A-22245 Countershaft and reverse Idler shaft retainer lock washer 3/8 (0.401-0.411 9/32 x 21/32) lock washer
|
|
If you follow the procedure outlined here, and your transmission growls, refuses to stay in gear or completely craps out, spewing metal and fluid all over the pavement, don't blame me. No matter what source of information you use, YOU are still responsible for the results.
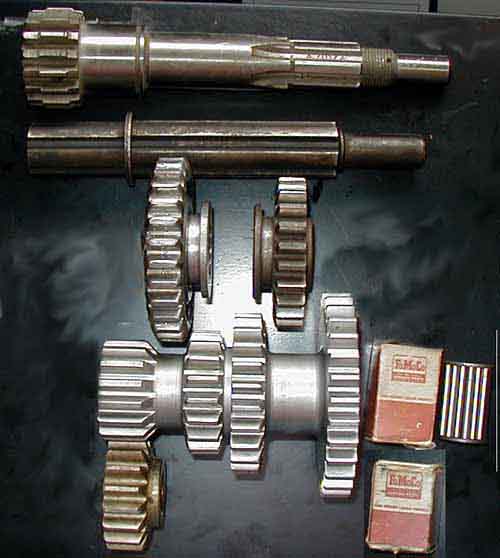
A few comments on shop habits. Get in the habit of keeping things clean, and orderly. If possible, as the assembly is broken down into it's pieces, clean them and lay the parts out in a logical order. When completely disassembled, I lay the parts out almost like an exploded view drawing. This is helpful when reassembling in that it 'shows' the orientation of the part, and prevents similar parts from being used in the wrong location. An example is the two oil slingers. They are not the same size but close enough to be easily confused, and if you aren't familiar with them, they are easy to re-assembly 'facing' the wrong direction on the shaft.
I won't go into getting the transmission out of the car. Mainly because I already had that part done when I decided to document the rebuild, and partly because it's covered in many of the books on the market. You have bought the books recommended on the other page of this site? If you haven't, I'll wait.......
Now that you are back and have removed everything that doesn't look like the transmission...if you haven't done so already, clean up the outside of the transmission. I take it to the local self serve car wash and pressure wash it. I cover the clutch, to keep it dry. Steam would work also. Remove the six bolts holding the shift tower and lift it off. Next the clutch and bell housing are removed. You need to prevent the input shaft from turning. Engage the low / reverse slider gear with the reverse idler gear and the intermediate / high slider with the cluster gear. This will lock the transmission and won't allow the input or output shaft to turn. This allows the removal of the nut holding the clutch and bolt holding the U-joint.
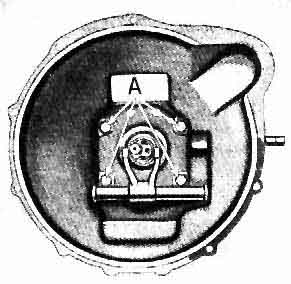
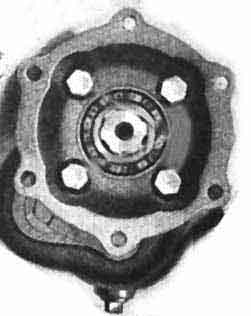
Next remove the counter shaft / reverse idler shaft retainer, allowing the counter shaft to be driven out the front of the transmission case. The photos in the service bulletins show this shaft being driven out the back of the case, DON'T go that way. The case has a taper and the shaft should be driven out the front of the case. The service bulletins correct this error in the next issue. Don't strike the shaft directly with a hard faced hammer. The shaft is hardened, and you run the risk of chipping either the shaft or the hammer. (It's all great fun, until somebody loses an eye!) This allows the cluster gear, two bronze thrust washers, and bearings to be removed.
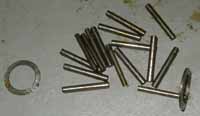
This is what was left of one of the |
Next pry or drive the reverse idler shaft out of the case and the reverse idler gear can be removed.
Clean up everything. I don't recommend blasting to clean the case, but if you must, use special caution to remove every speck of blasting material. Never blast gears, bearings, or shafts. The gears are cyanide case hardened and the shafts are hardened steel. From here on out, be meticulously clean. Dirt in a bearing can undo all the work of rebuilding the transmission.
I replace all the bearings. Unless the gears are exceptional, I replace all of them also. I hunt down as many NOS/NORS parts as I can find. This took about six months on this transmission. Do you HAVE to do this? Prolly not, but I do this as a hobby not as a speed contest, and I'm not under any deadline. Besides I enjoy the hunt. By the way, NOS to me means: New Old Stock, as in never been used, 1928 FORD parts. NORS means to me: New Old Ford approved Replacement Stock. NOS is not 1960 repop parts that have never been used. If you replace one gear with modern ...replace them all. The only exception to this is the reverse idler gear...do they ever have problems? If forced to choose between nice looking, used, original parts, and reproduction...I'd prolly pick the original parts. I feel there is something to be said for the use of good original parts, that have lapped themselves in, over the modern replacements. If forced, use ALL modern gears. Many people have, and obtained satisfactory results.
|
|
 |
| Here's the single plate clutch main drive gear A-7017-B. |
Inspect carefully any part that you can't find as NORS or better...also inspect any NORS/NOS parts. Any pitting, galling or wear will undo all the time and work involved.
 Be especially
careful of the 'nose' on the main input shaft. This rides in the
clutch pilot bearing in the flywheel. Wear here can cause misalignment through out the transmission, causing early failure of bearings, difficult shifting, growling, popping out of gear, and the
questioning of yourself as to why the H you bothered 'doing' the
transmission in the first place. If the rest of the shaft/gear is
in good shape (usually is) the nose can be turned down and bushed
back to size.
 |
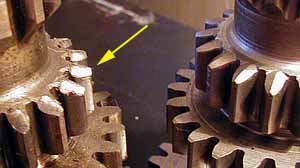 |
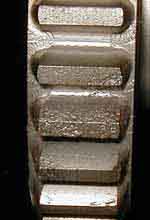
| Pitting on the gears will increase the noise of the transmission. | Wear (arrow) on the teeth will increase noise, and possibly cause the tranny to slip out of gear.The cluster gear shows the results of grinding into first. That's NOS to the right. You are looking for the best you can find. If that means the best you can find has some minor pitting, or minor wear on the tooth edges...then that's the best you can find. Don't give up too soon as there are still good parts out there. |
Prepare the parts for reassembly. Start with checking the clearance of the cluster gear to the case. The service manual calls for 'a few thousandths'. I've seen recommendations of 0.020 and 0.010. You decide which is 'best', I go for the smaller. Stand the case on a flat surface and place the cluster gear and two bronze thrust washers (if used) in the case and check the clearance. If needed, thrust washers will have to be obtained or made. The thrust washer for the king pins can be used. Remove the cluster from the case.
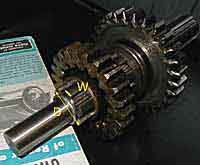 Next
check the fit of the slider gears on the output shaft. The
clearances were changed on these parts, and you are looking for a
very close fit. The outside diameter (D), was changed from
1.2465-1.2475 to 1.2485-1.249. Dimension W, width of the splines,
was 0.3095-0.3115 and was changed to 0.308-0.309. The large
diameter of the splined hole in the gears was changed from
1.2490-1.2505 to 1.2495-1.2505. Lube the shaft and try the gears.
With the shaft vertical the gear should just slide down by it's
own weight, or with a little finger pressure. If they fall
quickly, rotate the gear one spline and try again. If you can't
find a position that won't allow the gear to fall rapidly, you
need to find either a different shaft, or gear(s). Too loose a
fit here will allow the transmission to pop out of
gear.
| Remove the snap ring holding the spacer, slinger, bearing and baffle from the old input, and the slingers and bearing from the output shaft. Note which slinger goes where, and the orientation of the slingers on the shafts. | 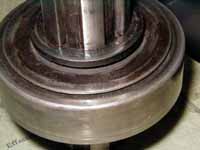 SLINGER ON ORIGINAL OUTPUT SHAFT BEARING |
 |
The original bearings were unsealed (A-7025 in photo as an example) and the transmission fluid was prevented from leaking by the two oil slingers...well, it's more like the transmission fluid was thick enough, that with the original bearings and slingers you could add fluid faster than it ran out...not much faster, but faster. The modern replacement bearings are sealed (A-7065 in photo) on both sides and lifetime lubricated. Some people like to remove the seal on the gear side of the bearings. |
Chase all the threads and look for cracks in the case.
I spray a light coat of an easily removed paint on the flat machined surfaces and lightly dress them with a broad flat file, then remove the paint. I use the paint to tell how close I am to flat, and to remind myself not to take so damn much material off that I screw up the surface instead of removing burs and such. Don't try to remove all the paint with the file...just the high spots caused by nicks. Leave as much of the machining marks as you can.
The next step is to paint the castings with Ford engine green. As a general statement all the parts in the transmission are either unfinished, raven, or Ford engine green. Also all general statements are false...which is another general statement. Check the standards for the finishes of the individual parts, as they pertain to your month and year car.
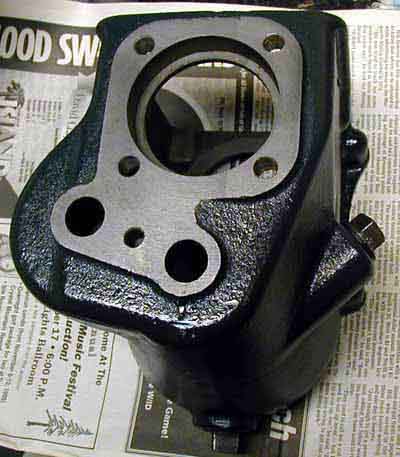

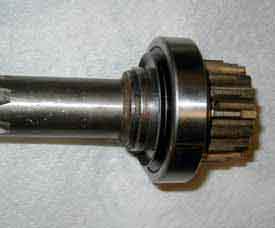
I heat the bearings on a light bulb and they generally go on with out too much cussing. Don't forget the slingers and pay attention to the direction of installation. Don't damage the bearings while installing them.
Now it's just a matter of
getting all the parts back together. Lightly lube the parts prior
to assembly. Install the reverse idler gear.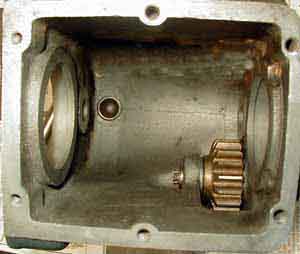 Pay attention to the
orientation of the gear and be sure the flat on the shaft lines
up with the retainer. I like to use a little gasket sealant on
the last 1/2" or so of the shaft.
Next insert the bearings and
spacer (if needed) inside the cluster gear. You do remember which
bearing goes in which end? Just in case, the long bearing (A7121)
goes in the small gear end. Place the gear in the case. If your
case requires the bronze thrust washers don't forget them. Drive
the shaft from the front of case (carefully), again watching the
alignment for the retainer. I use a little sealer on the last
1/2" of the shaft and on the retainer end of the case. Check the
free movement of the cluster and reverse idler gear. Install the retainer using gasket sealer on the threads. Be sure to use the correct length retainer bolt. The length was changed with the change in cluster/idler shafts.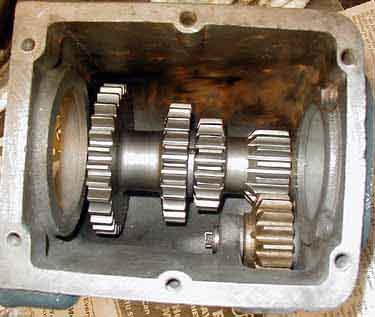
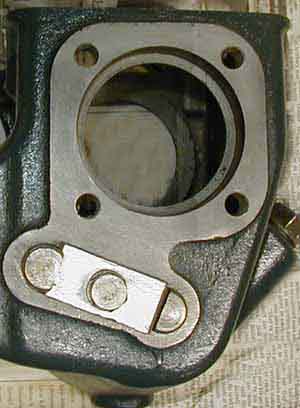
Insert the output shaft through the rear of the case, installing the sliding gears at the same time. Pay attention to the orientation, and position of the sliders. Press the rear ball bearing (A7065) into position in the rear of the case.

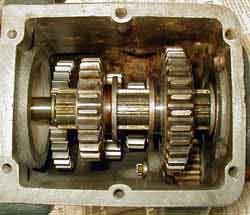
Install the gasket and bearing retainer. Again use gasket sealer on the threads.
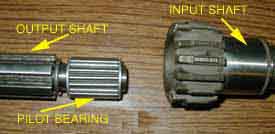
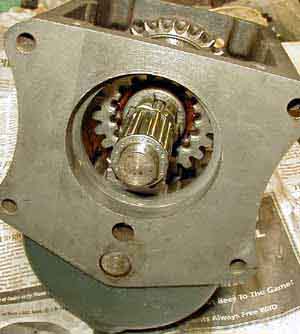
Slip the roller bearing (A7118) on the 'nose' end of the output shaft, insert the main drive gear into the front of the case, and gently press the main drive gear bearing (A7025 Not shown in picture above)until it seats on the shoulder cut in the case. Rotate the input shaft and make sure nothing is binding or obstructed.

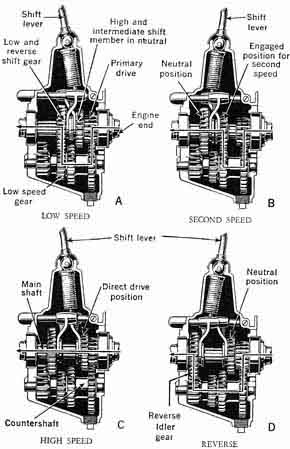 |
You should now be ready to rebuild the shift tower and clutch to complete the transmission unit.
Page designed by Jim Mason July, 2007
