|

|
|
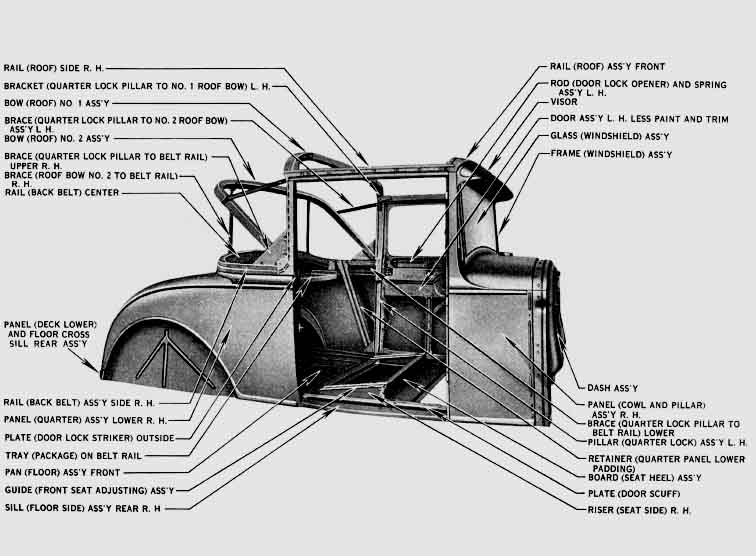
Hi Jim, Well... here it goes then........ I have restored a 30 Tudor, an early 30 AA stakebed truck, a 29 pickup, a 30 coupe, a 26 T, and most recently our 28 sport coupe. I don't recall any part being more difficult to locate, restore or install than the belt rail moulding on our coupe. The search for a piece in good condition took about 4 years. We located one that was relatively free of rust and still had a good contour. The trick with this part (as I'm sure you know) is the attempt to seperate the outer and inner pieces. Very difficult to do without cracking or crimping the delicate outer piece. I've seen show cars that have this trim installed very poorly and it is easy to see that people really struggle to get this trim on the car with good appearance. My friends and I had a special coupe and my sport coupe staring us in the face...both needing to have these parts installed. We spent a good deal of time "brainstorming" to come up with a way to accomplish this. As I noted, we had a couple good pieces that had not been taken apart and we decided that doing so had been the downfall of those that "went before us". The trick was to restore and install the trim intact ...that is, without seperating the two pieces. We started with my sport coupe. We carefully cleaned up the belt rail, primed, sanded and painted it to the point of being ready to affix to the car. We also had to make the small "tabs" that are on each end of the outer piece which "wrap around" into the jams of the doors. These little "tabs" also help secure the belt rail with small nails at the door jam. We had one to take patterns from. (lucky) We knew we needed a secure way to attach to the wood belt rail, but did not want to rely on epoxy or nail through the finished part and then try to somehow attempt to cover our "sins" with filler. We noted that the side of the inner piece that faces the wood has the edges folded over creating a space. I found a trim clip for Chrysler cars at NAPA (Balkampf part...#BK 665 - 1917). This clip is used to attach door trim. There is a threaded post which would go into the door panel. On the end which would hold the trim, a shape that would be secured in the back of the trim and held in place with a single spring tension wire. We experimented with this trim clip and found that by simple removing a small bit of material with a file, it would fit in the groove on the inner piece of our belt rail. It held securely and even provided for the ability to "slide" from side to side in the groove for some forgiveness later. We installed nine of these on the belt rail trim...5 along the back and 2 on each side. We then needed a way to mechanically attach these to the belt rail wood. We used the plastic inserts which are supplied by LeBarron Bonny (P51) that press into holes in the doors of trucks and attach the door panels with ring shank nails. Familiar with these? We had to experiment with drilling holes in test wood to get just the right size hole. This so that the threaded post of our trim clips would enter the inserts without too much force, but still expand enough to hold tightly when pressed into the insert. We used a forestner bit to countersink the heads of these plastic inserts flush with the belt rail wood and used just a drop of strong 2-part epoxy to secure the inserts in the wood. Once all was ready, 3 of us lined up the threaded posts with the inserts as best we could. (One guy on each side and one guy at the back window.) We started in the middle of the back just under the rear window and pushed the threaded posts into the inserts following around each side. A nice tight and secure installation!!!!!! We then put a nail in the tabs at each door jam and done. The part has to be fitted to the belt rail wood perfectly...but once installed in this way, it is undamaged and very, very secure. All that was left was to pinstripe and have a nice drive. How's that for a story? I know it may be a bit hard to envision this process...but with the trim clips and inserts in hand...it's an obvious process. We're about to do it again on a business coupe and suspect with carefull fitting of the belt rail trim...it will work just fine again. Questions?...Comments? Wayne |
Page designed by Jim Mason September